This post is for myself, two weeks ago. I needed something like this. Or, maybe it’s for you? You know a little bit of Python, kind of understand the MVC concept and have a clear understanding of RDBMS? Congratulations, you will have no trouble getting something up and running in Django in a couple of minutes.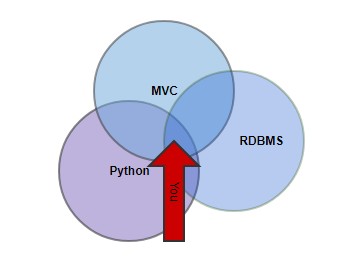
Whether you need to move a database to an editable, shareable environment for less tech savvy people (phpMyAdmin), or move some spreadsheets to a database and want a quick CRUD setup? Django, a Python based web framework, can help. Follow these steps (yes, Django docs are great, but elaborate).
Step 0 Database design
The most important step. Forget about the rest if you don’t have this in order. Design a good database. Think about your keys and relations. You can use MySQL Workbench or edit Python code (more on that later) to create a database. If you get this step right: Django takes care of the rest!
Here is a small database setup I used. Made with MySQL workbench.
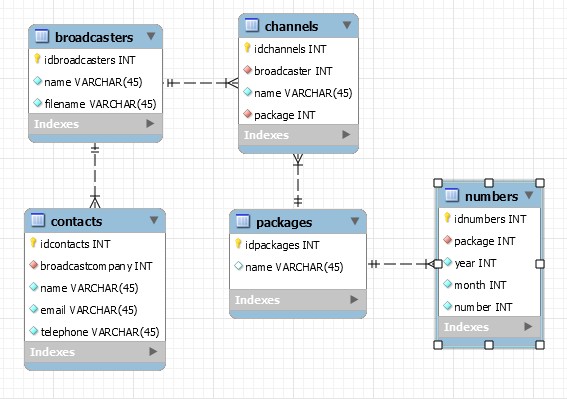
So I created this, exported it and and imported it into a MySQL database. But you can have a different approach. As long as you think about your database design.
Step 1 Setup your environment
Normally this would be the first step. But since database design is vital I made that the first step. So, I assume you have a Python environment, therefore you are gonna use virtualenv. You don’t need-need it, but it creates an environment where you can’t break too much. Python uses pip to install packages. Django itself is a such a Python package, but most of the time you don’t want random development packages cluttering your main system. You want to keep all of that in your virtual environment. Virtual is a big word: it is just a dedicated directory.
mkdir venv (or any name)
virtualenv venv -p /usr/bin/python3.4 (or whatever your Python location is)
source venv/bin/activate (activate the virtual environment)
Bam! You are now *in* your virtual environment: noted by the prompt (venv). If you now invoke pip it installs packages only in that virtual environment. Want to leave the virtual environment? Type: deactivate.
Step 2 Create your Django project and app
Next, you need Django. You can install it system-wide or only within your virtual environment. Either way, just use pip:
pip3 install Django
pip3 install mysqlclient
Now you have Django (and you have installed the mysqlclient with it). Depending on your system you may also need to install libmysqlclient-dev (apt-get install libmysqlclient-dev on Debian) for the mysqlclient to install correctly.
Next: create a Django project. A Django project is a collection (a folder!) of apps. And apps are also folders. They all sit in the same root folder, together with the manage.py file. This next command creates a folder and within that folder another folder with the same name and it creates the manage.py file. This is your project.
django-admin startproject my_fancy_project
Next: create an app. Projects don’t do much by themselves: apart from some settings. So in the project directory where the manage.py file is, you type:
python3 manage.py startapp my_awesome_app
A folder will be created next to your project folder. This is your app folder and where most of the work will be done. You can create as many apps as you like. Some projects are one app, some are multiple. Apps share the project settings.
Step 3 Create your models
Django comes with batteries included. Meaning, by default it has a db.sqlite3 file as a database. This database stores users and sessions and all that. However I want to use MySQL.
On to the magic!
So my database (step 0) is in MySQL.
In your project settings.py file point your project to this database:
DATABASES = {
    'default': {
        'ENGINE': 'django.db.backends.mysql',
        'NAME': 'iptv',
        'USER': 'iptv',
        'PASSWORD': 'my_awesome_password',
        'HOST': '127.0.0.1',
        'PORT': '3306',
    }
}
Now we want to tell Django to look at our database and DO THE WORK. Use the inspectdb command to INSPECT your database and AUTOCREATE a models.py file.
python3 manage.py inspectdb my_awesome_app/models.py
The models.py file is your most important file. It holds the logic for your app. This is a file with essentially Python code that describes your database (every table as a class). You can also code it by hand, but inspectdb is very handy!
Here is what my class/table/model called Package looks like in the models.py file. This is autogenerated by inspectdb. I added the __str__(self) function by hand (so you see the right name in Django). And notice how it links to your db_table ‘packages’.
class Package(models.Model):
    idpackages = models.AutoField(primary_key=True)
    name = models.CharField(max_length=45, blank=True, default="", null=False)

    def __str__(self):
        return self.name

    class Meta:
        managed = False
        db_table = 'packages'
Congratulations! You now have code that understands and can talk to your database!
Step 4 Profit!
You’re done. What do you mean? Well, this is where Django shines. It comes with a very capable Administrator interface, user management, logging and more. Django is designed to quickly get something up and running so people can start filling the database while you create a frontend (view). However for intended purposes, maybe you don’t need a frontend. Maybe the Administrator backend interface will do just fine.
Okay, there are still a few steps. But you came this far, so the next steps are easy.
Of course you need a user: create one. This will only work after you’ve done makemigrations and migrate (see below).
python manage.py createsuperuser --username=jan --email=jan@j11-awesomeness.com
This will create a Django user so you can log in to the admin backend. But wait, nothing is running yet. You can use whatever webserver you like, but batteries included, you can just start up a Python webserver:
python manage.py runserver 0:8000

(venv)[11:08:59]jan@server:~/projects/my_fancy_project$ python manage.py runserver 0:8000
Performing system checks...

System check identified no issues (0 silenced).
November 22, 2017 - 10:09:02
Django version 1.11.7, using settings 'project.settings'
Starting development server at http://0:8000/
Quit the server with CONTROL-C.
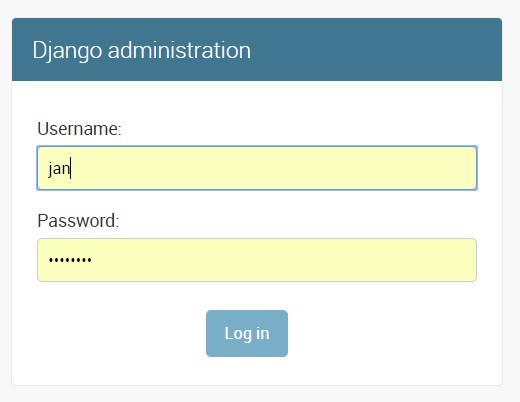
This starts a webserver on port 8000 (choose whatever port you like). You can now browse to http://[youripaddress]:8000/admin and you will be presented with a login screen.
Note that whenever you make changes to your database structure (don’t do this too often, start with a good design). Run the following:
python manage.py makemigrations
python manage.py migrate
This will make a migration schedule for you, and migrate things. But you also need to use these commands to initially migrate from the built-in default database (db.sqlite3) to MySQL: after you defined the settings.py file (step 4).
So, I have a user, I migrated my Django project to MySQL, I have my models.py file and I have a webserver running. So, I get a login screen like this on http://[youripaddress]:8000/admin
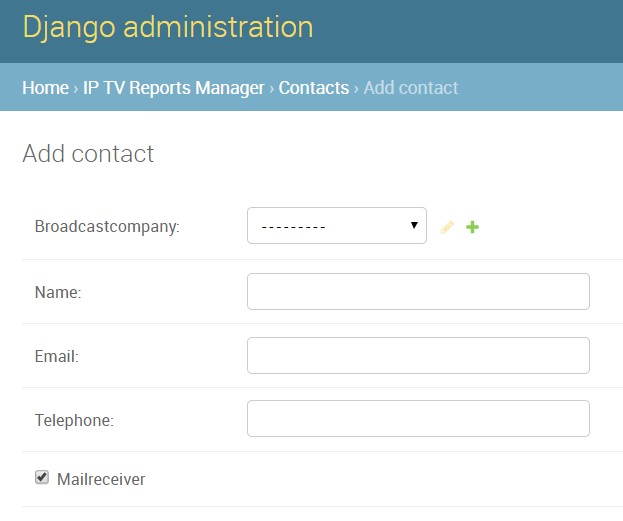
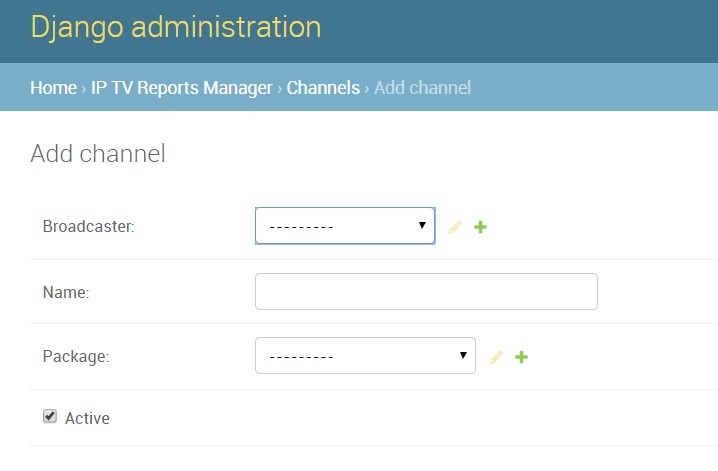
So I logged in. But where is my app? Where are my models/tables, so I can edit them? Well they are there, just not visible in the admin interface just yet. In the settings.py project file add your app to INSTALLED_APPS. And you’re done. You now have a complete CRUD environment where you can create and edit users and groups (Django default) and tables from your app (oh yeah!). It looks like this.

When you click the tables (models!): you can see automatic dropdown lists with database relations and checkboxes and all that. This is all generated from the models.py file.
As said, this is a quick way to get your data in de Django admin interface and start adding data, while you work on the frontend (views). I am not doing that, the admin is good enough for me. So, remember: apps are folders, the models.py file is important, most things are done with manage.py.
Django is really popular and there are lots of tools/libraries you can use/hook into your own Django app. Just use pip. For example I use django-sql-explorer which is a full frontend to create, store and export SQL queries.
Conclusion
I like Django because from all the things I tried (things: easy web CRUD) this made the most sense. I also like the start-with-your-database-design approach (very reminiscent of MS Access, which I love). However, I still think it maybe is too much work. Sure, if you have done it before, know virtual environments, know manage.py, know a bit of Python, this all really can be done in 5 minutes. Really. However, if you haven’t, maybe this could all be a bit overwhelming, so hopefully this blog helps! Or maybe there are even easier tools to get something up and running quickly?

Hi thanks for your Posting.
I am very beginner on python and django. basic with php.
Can you write Post about Django CRUD mysql with Manual step by step.
Not with instant like your post. + using query on views.py.
Im so confused.
thanks
Read the tutorials at https://djangobook.com. Django is really easy and, yes, real Django programmers use the built-in admin module all the time because, well, you get it for practically zero effort.
Writing views is easy. Read the tutorials.
Thanks this article is awesome
thanks for this intro however I found some problems (using python 3.7.1 & win. 10) : 1) inspectdb only works if I pipe to models.py (corrected) but not with syntax provided; 2) createsuperuser syntax does not work (corrected) and 3) when I add my app name to settings.py, i get uncaught exception – ValueError: source code string cannot contain null bytes.
So I got the basic authentication screen without the models. The models.py looks like it propagated okay but It seems that there is more do be done before the models will appear
Hey there.! i m working with django.
can you please answer some of my queries ?
A) after performing the above steps will my django admin interface will have MYSQL database ?
B) Is there any command-line command to verify the name of database my django app is using.?
C) how can i modify my code so that each time the authorized user logsIn, a database entry is created with the username & datetime ?
here’s my code https://stackoverflow.com/questions/57249999/user-authentication-using-django-and-mysql
thnku if u can help.!
Pingback: Popular post postmortem | Jan van den Berg
Pingback: PHP: how did it become so popular? | Jan van den Berg
Pingback: Foster: how to build your own bookshelf management web application | Jan van den Berg